Unprocessed gum elemi. Very viscous, and will hold a palette knife that is stuck into it.
Saturday, March 10, 2012
Gum Elemi used as a Medium 2
Unprocessed gum elemi. Very viscous, and will hold a palette knife that is stuck into it.
This is a photo of a jar of gum elemi, mixed with gum spirits of turpentine, and one can observe the clear material at the top, and the sediment that forms on the bottom.
This is the gum elemi mixed with gum spitits of turpentine. It is starting to get cloudy as the elemi dissolves in the solvent.
A little while later, and a little more cloudy. This will dissolve down to its saturation point. That is where no more resin can be accepted by the solvent, and then the remainder will stay in an undissolved form. I like to go by the saturation point as a reference point.
The resin is a component of the entire material. I dissolve the raw material in gum spirits of turpentine, thus liberating the resin from the waxy material and debris, which remains at the bottom of the jar. The resin in the turp is clear as water. At that point, I add a little more raw elemi, and watch it over a day. It will continue to dissolve, and when no more of the lump goes down, it is at a saturation point. I wait till fully settled, and clear, then remove carefully, with eye dropper. I then combine 50/50 with hard copal medium. Very little will alter the properties of paint.
This material will remain cloudy for several days, and then will clear. The turpentine will solve the resin, and a waxy sediment will form, on the bottom of the jar. The debris will remain with the sediment. This sediment can still retain some unsolved resin, and I won't go into detail about my exact process, but the material that is on top is absolutely clear, and to my eye refracts light to a greater extent than water, as it magnifies images through the glass, moreso than other materials. I would further add that the material is as liquid as gum spirits of turpentine.
I remove this material very carefully with an eye dropper, to avoid stirring up the sediment.
This is a picture of the elemi that has been removed from the jar. It is very clear, and thin, in its nature.
Another picture of the elemi. I store this material in 30 ml. bottles, and have found these quite useful.
In this state, the material can faciliate the manufacture of copal mediums, as it acts as a thinner, yet jacks up the resin content, all the while, acting as a plasticizer, and permitting effects that copal alone does not. It also seems to speed up the drying of oil paint.
Although very thin, once the turpentine evaporates off, a highly sticky residue remains. This residue provides the benefit to paint, in my opinion.
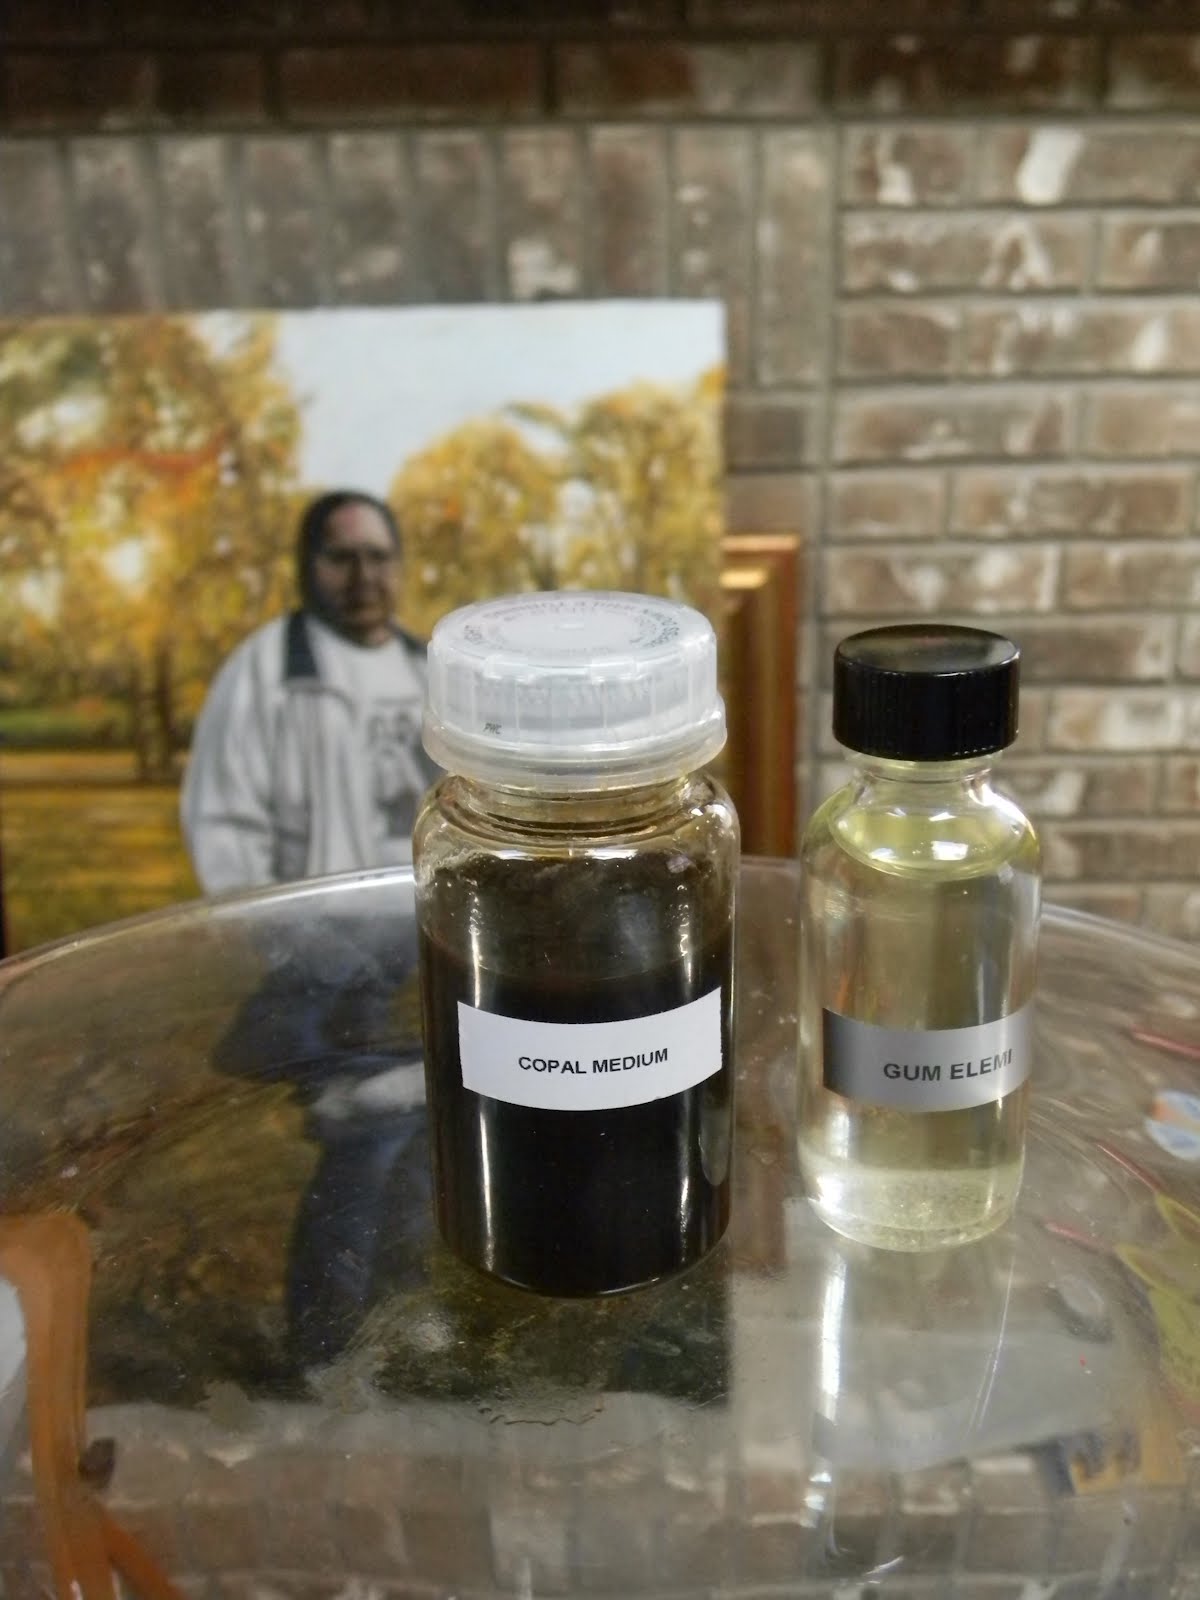
This is a small jar of copal medium that I made last year. It is hard copal that has been fused, processed further, and then cooked into linseed oil. This is an excellent medium, for a variety of uses.
These are the two materials that I will combine, to create a copal/elemi medium. The copal has a resin content of approximately 25% resin to linseed oil.
The copal is from Kremer, and is a hard copal. This doesn't mean that on Moh's scale it is any harder than a soft resin, such as damar, or manila copal. Rather, it must be fused before it can be made into a medium. Fusing hard resins is difficult, and dangerous, and I would not encourage anyone to try it. The copal is actually quite a bit more difficult than even amber to fuse, and make into a medium, as it is very difficult to effectively combine with linseed oil. Amber is much easier. If not done right, one ends up with an unusable mass that resembles snot. A turbid disaster. There are also serious dangers regarding the heat needed to process this material.
In this picture, I have a small amout of copal medium, on a palette knife. I will place this on the glass plate.
In this picture, I have added an equal volume of the elemi/turpentine solution, to the copal medium, that was placed on the glass plate.
I next mixed the elemi/turpentine, with the copal, and used a small palette knife to accomplish this. I call this medium: Bouguereau Medium.
I then placed several same size nuts of ivory black oil paint, made by Liquitex, and comparable piles of titanium white oil paint, that I made last year, onto a paper palette. Next I added a drop of the medium to one piles of black, and one pile of white.
Next using two of the same brushes, I quickly mixed the oil paint that was without the medium; just oil paint alone (as depicted on the left).
Then using a clean brush of the exact same type, I mixed the black and white paints which contained the small amount of elemi/copal medium, together, very rapidly, using the same strokes. This is depicted on the right.
The paints were the same (type/amount), the brushes were the same, and the strokes were the same, but the paint with the elemi/copal blended much better. It blended with a great amount of ease. Although certainly not scientific, and for all intents and purposes a quick and dirty demo, it should illustrate my point. Just two drops dramatically alter the paint.
Although oil paint alone is known for its blending properties, and copal has some great effects, the elemi, permits a blending that is so easy, it almost does it for you. It is a pleasure to work with, and permits a paint film that has a super sfumato effect. One can easily obscure all edges, and then come back and add some hard, wherever they want, for contrast; with great eases. The elemi also thins out the ultimate medium, so that it is thinner than those containing Venice turpentine, or Canada balsam. The colors just go right into each other. The paint alone does blend, and could be blended further, but the effect would not be the same. With the same strokes, one just goes together, and in the other image, the paints maintain their individual value properties, to a greater extent.
Obviously, this medium would not be good, if a more impasto, painterly approach is desired.
I would further add that this medium permits a very smooth level surface, to a larger extent than even the other balsams do.
At one point I got some of the turpentine containing elemi on my fingers, and it felt no different than regular turpentine, until the turp evaporated. My fingers stuck together. This illustrates why I think it should be combined with an oil, and shouldn't be added directly to paint.
A couple of weeks ago, I combined the elemi in a 50/50 mix with a good quality stand oil, as I wanted to see it copal was necessary. In effect see how this performs. Since stand oil is commonly thinned with turp, and it does have properties that are similar to mediums containing hard resins, I thought that the elemi may approximate the effects of copal, and thus make the copal medium redundant. The stand oil is very tough and flexible as is, and the elemi will provide a measure of flexibility, and grab. Also, since the medium is crystal clrea, it won't change colors at all. I haven't tried this Elemi/Stand Oil Medium yet, but will be doing so soon. Fingers crossed!
I have never known of any elemi mediums to be available for sale, anywhere since I have been involved with painting, over the past 20 years. Obviously gum elemi is still available, and there are materials for sealing wood etc., yet I don't know of any elemi mediums being sold as such (i.e. a medium to create soft flesh tones, a well blended effect, an level surface, and for any and all of the properties that the material gum elemi imparts). Even in times gone by, I suspect that artists such as Bouguereau (being quite creative, and fully aware of materials) combined materials, and made these things themselves. I have worked hard for years to develop these ideas and mediums. Much trial and error.
Monday, December 5, 2011
Along The Ohio
Sunday, November 6, 2011
Palette Cups, by Larry Seiler
For years I have read Larry's ideas, and information, and was thrilled to receive this small oil painting from him. This artist has contributed more to other artists than he is likely to ever know. Reading is one thing, as is seeing pictures, but it is quite impressive to own a piece, and be able to directly observe the masterful brush strokes. An inspiration, and treasure.
Colors, shadows, composition, contrasts, balance, the idea, it has it all. Also, the panel (support) is absolutely impressive! Thanks Larry.
Friday, November 4, 2011
Making Oil Paint: Ivory Black
I received some genuine ivory black pigment from a friend who makes it from scratch, using mammoth ivory. No elephants were harmed to obtain this pigment. Ivory charcoal was made using a traditional method, and then milled into pigment form. The pigment from the ivory bark produces a black that is very similar to bone black. The pigment which derives from the inner part of the tusk is very different than bone black, and when mixed with white, produces a grey, which leans blue.
The pigment is not uniform in particle size, and is initially coarse. This black is very versatile, and makes a very oil rich paint. Since this amount was only 150 mg, I used a couple of glass dishes, and a large palette knife. For larger amounts a glass muller and slab are better suited. The oil is cold pressed linseed oil, which is very good for those who make their own paint. It wets the pigment very well.

The ivory black pigment is placed in a glass container, and linseed oil is added in small amounts, and mixed with the pigment. This forms a slurry, and is the precursor to paint. At this point, the particles are not encapsulated in oil, and there are agglomerations throughout. Again, the particles are not uniform, and will be broken down in size while mulling progresses.

Initially it is very loose, and oily. It will drip right off of a palette knife, and is in no way a paint at this point.
The oily slurry is placed on a glass dish, and ground out with a palette knife. It is initially very course, despite being loose and oily. This is ground, and thickens up, as the particles are broken down and smashed into the oil, so that each little particle is fully surrounded by linseed oil. If this doesn't happen, problems with the paint can result, later in the life of the painting. In this picture you can see the course pigment, and the small amounts of linseed oil that I have added with a dropper. The additional linseed oil is mulled into the mix.
In this picture you can see that the material has been worked a great deal, and there is quite a bit more oil in it. It is smoother, but still requires work.

This is further along, and quite a bit smoother. I tend to stretch this out quite far, and work it until it appears to dry out. Then add more oil, and work that in until it feels very smooth, with not the slightest gritty feel. When it is ready, despite having a great deal more oil than at the onset, it is very smooth, and firms up, so that it has body.
The pigment is not uniform in particle size, and is initially coarse. This black is very versatile, and makes a very oil rich paint. Since this amount was only 150 mg, I used a couple of glass dishes, and a large palette knife. For larger amounts a glass muller and slab are better suited. The oil is cold pressed linseed oil, which is very good for those who make their own paint. It wets the pigment very well.
The ivory black pigment is placed in a glass container, and linseed oil is added in small amounts, and mixed with the pigment. This forms a slurry, and is the precursor to paint. At this point, the particles are not encapsulated in oil, and there are agglomerations throughout. Again, the particles are not uniform, and will be broken down in size while mulling progresses.
Initially it is very loose, and oily. It will drip right off of a palette knife, and is in no way a paint at this point.
This is further along, and quite a bit smoother. I tend to stretch this out quite far, and work it until it appears to dry out. Then add more oil, and work that in until it feels very smooth, with not the slightest gritty feel. When it is ready, despite having a great deal more oil than at the onset, it is very smooth, and firms up, so that it has body.
The end result is a very smooth, highly pigmented paint, that has body but is more loose than modern tube paints. This particular color is very rich in oil, and therefore not good for underpaintings. It is better when used in later layers, and is excellent for mixing with most other colors. At the end of this batch I added a very small amount of baltic amber varnish that I made, which adds a bit to the body, and provides several other advantages. When I finish mulling the paint, I place it with a small palette knife into empty aluminum tubes specially made for this. Although time consuming, as with anything else, the more that one does something the quicker it becomes.
Subscribe to:
Posts (Atom)